How To Set Up And Use A GitHub Blog Page
Beginning Tutorial (from this page)
Step 1: Create a GitHub Account
If you don’t have a GitHub account, create one, otherwise go log in.
Note: Your username will eventually be part of your websites URL, so just keep that in mind when picking a username.
Step 2 - Open template I built for you
Log into your GitHub account and then click this link.
Step 3 - Name and create your repository
Name your repository like this: {Your GitHub username}.github.io
If you don’t name your repository with your exact GitHub username, none of this will work.
- Example: If your GitHub username is “kombatEldridge”, then name it kombatEldridge.github.io
Make sure you leave it set to “Public”. If you set it to “Private”, your website will not be published.
Now you can click “Create repository from template”.
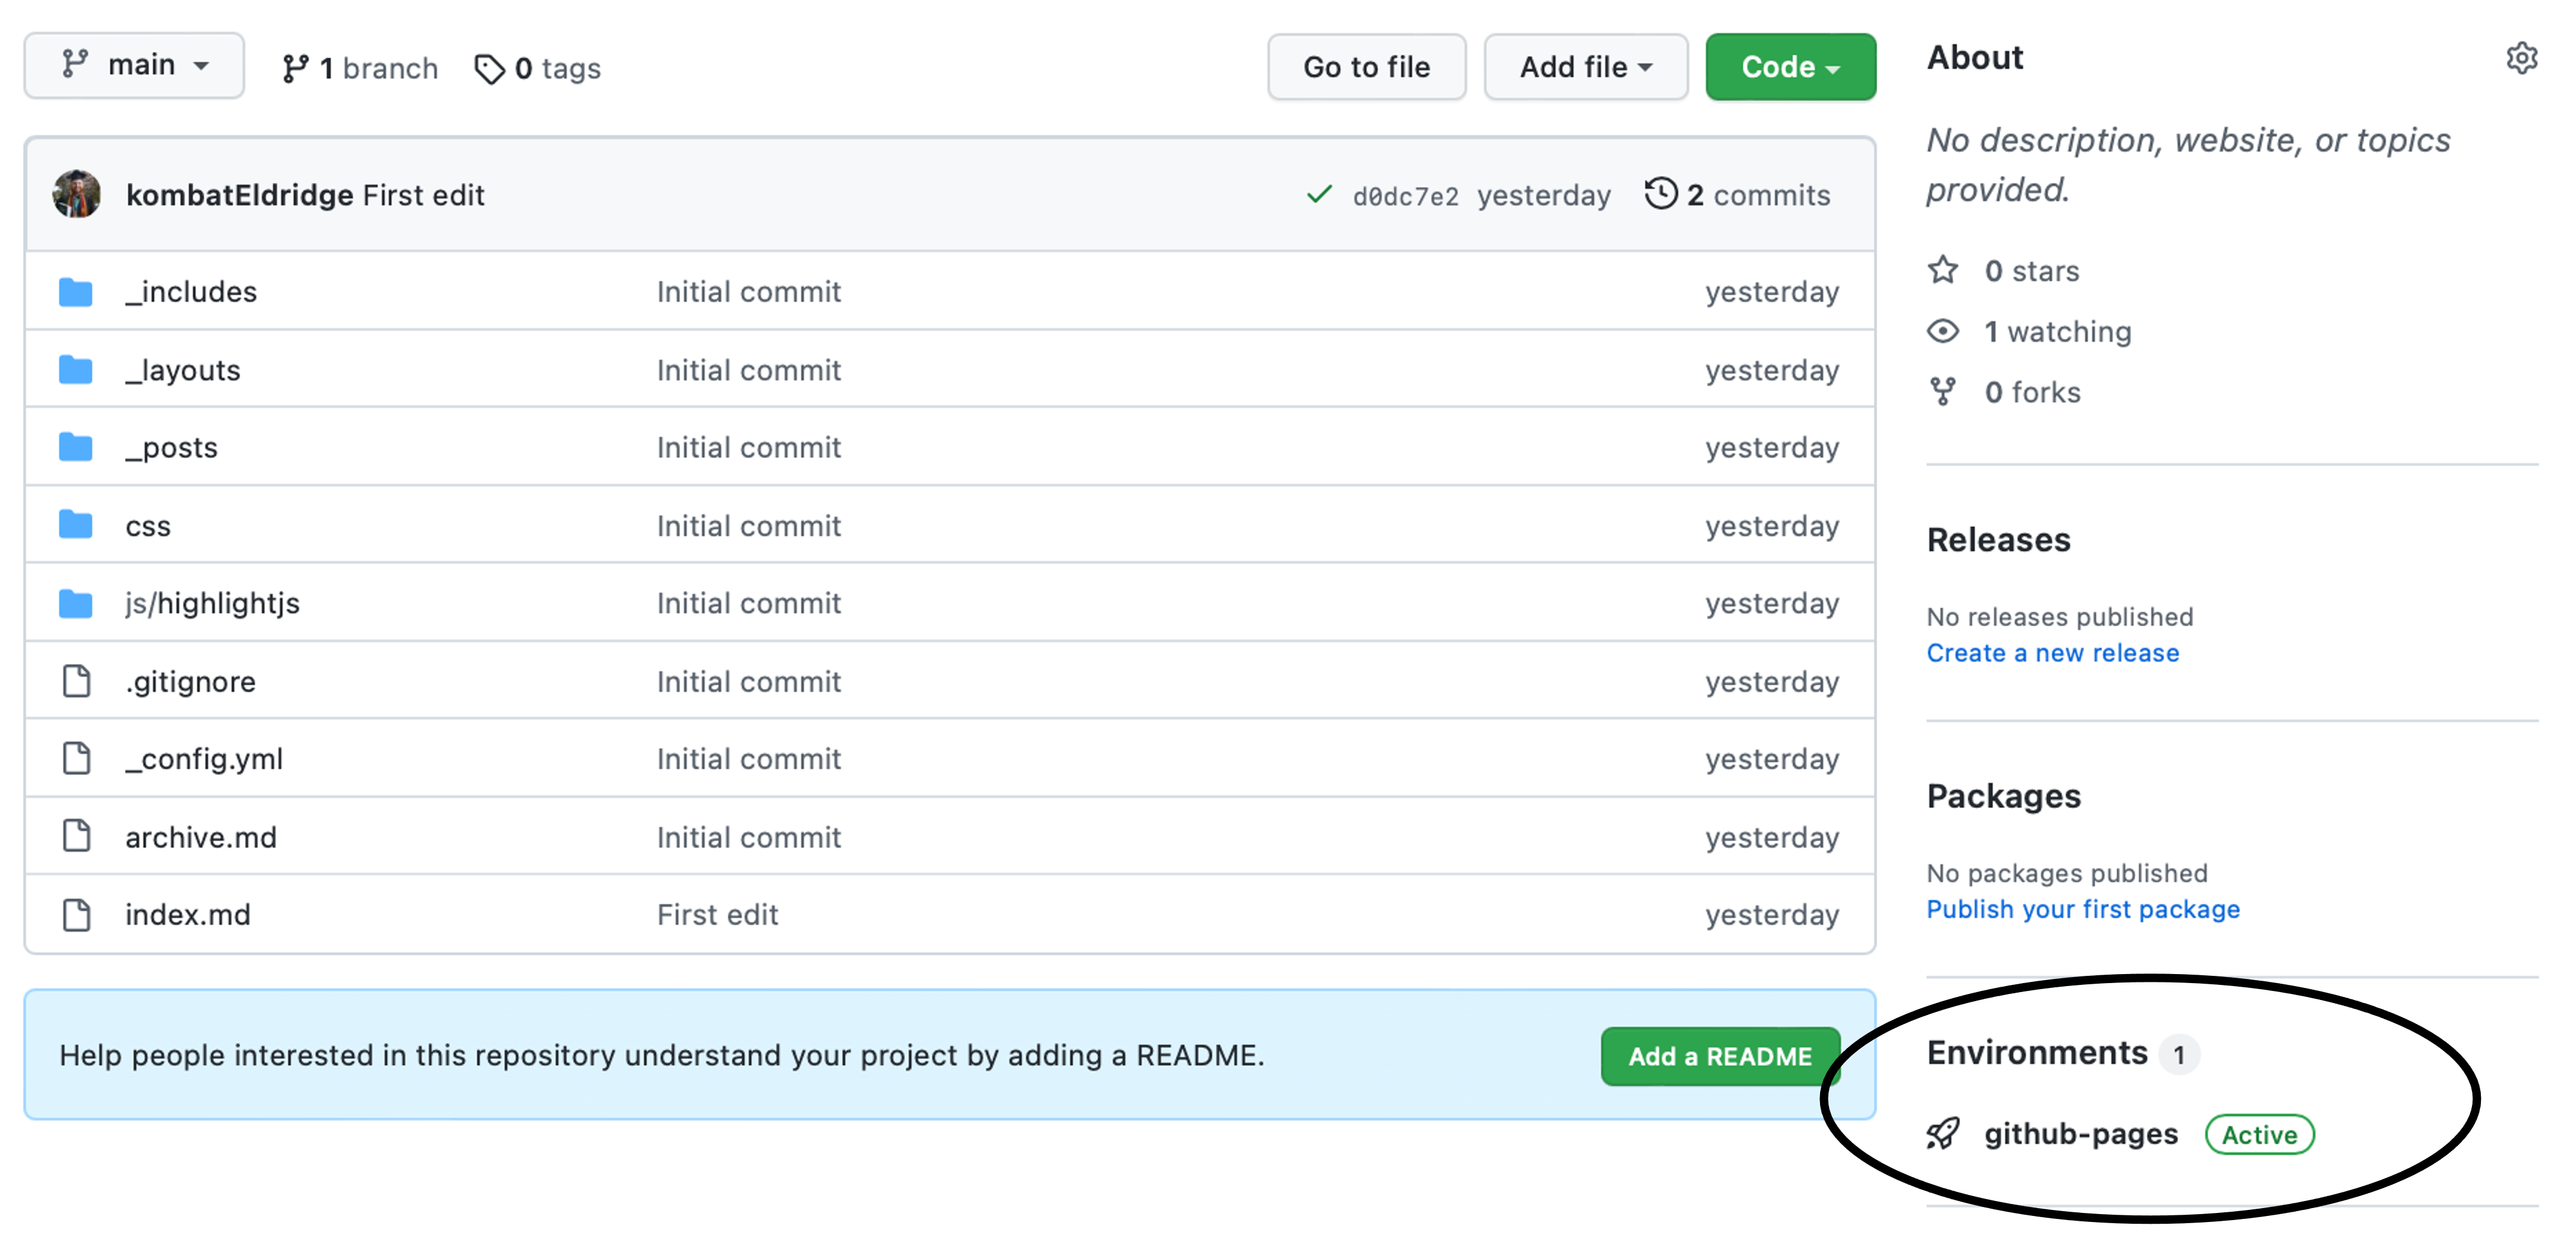
Important Note: There will be a few minute delay, but eventually GitHub will recognize that you created a GitHub Pages repository, it will automatically pick it up and create your website. And they will do this, every time you make a change.
On the repository page, you will see in the bottom right the status of your environment wether or not your GitHub page is Pending or Active.
Editing Your Page
You can make edits to your home page by making changes to your index.md file.
This file, and the rest of the blog files are writen in the Markdown language. There are many tutorials on how to write in this language, and it is a very simple language.
To change the metadata of your page, you need to edit the _config.yml file, which gives you the name of your page and description of the page in case you want to send your blog as a link. If there is anything in the index.md or _config.yml that you don’t want, you can comment it out with a #.
Creating a Blog Post
Step 1: Create New File
To create a blog post, you can create a Markdown file in the _posts folder.
Note: When naming your blog post file, you must name it in the following manner, or else it will not work:
yyyy-mm-dd-your-blog-post-name.md
Step 2: Starting Your Post
When you create this blog file, you will want to start it by adding a header. This will double as the name of your blog posting on your home page. Use at least one # before the title to indicate it as a header.
Editing Your Blog Page
Option 1: GitHub
If you want to make changes to your blog post, you can always just use the repository menu in GitHub and edit files that way. Anytime you make a change to a file, you jsut need to commit the work you’ve done, and after a couple of seconds, the blog page should auto-update.
Option 2: Visual Studio Code
This option is only for those who use Visual Studio Code to write code.
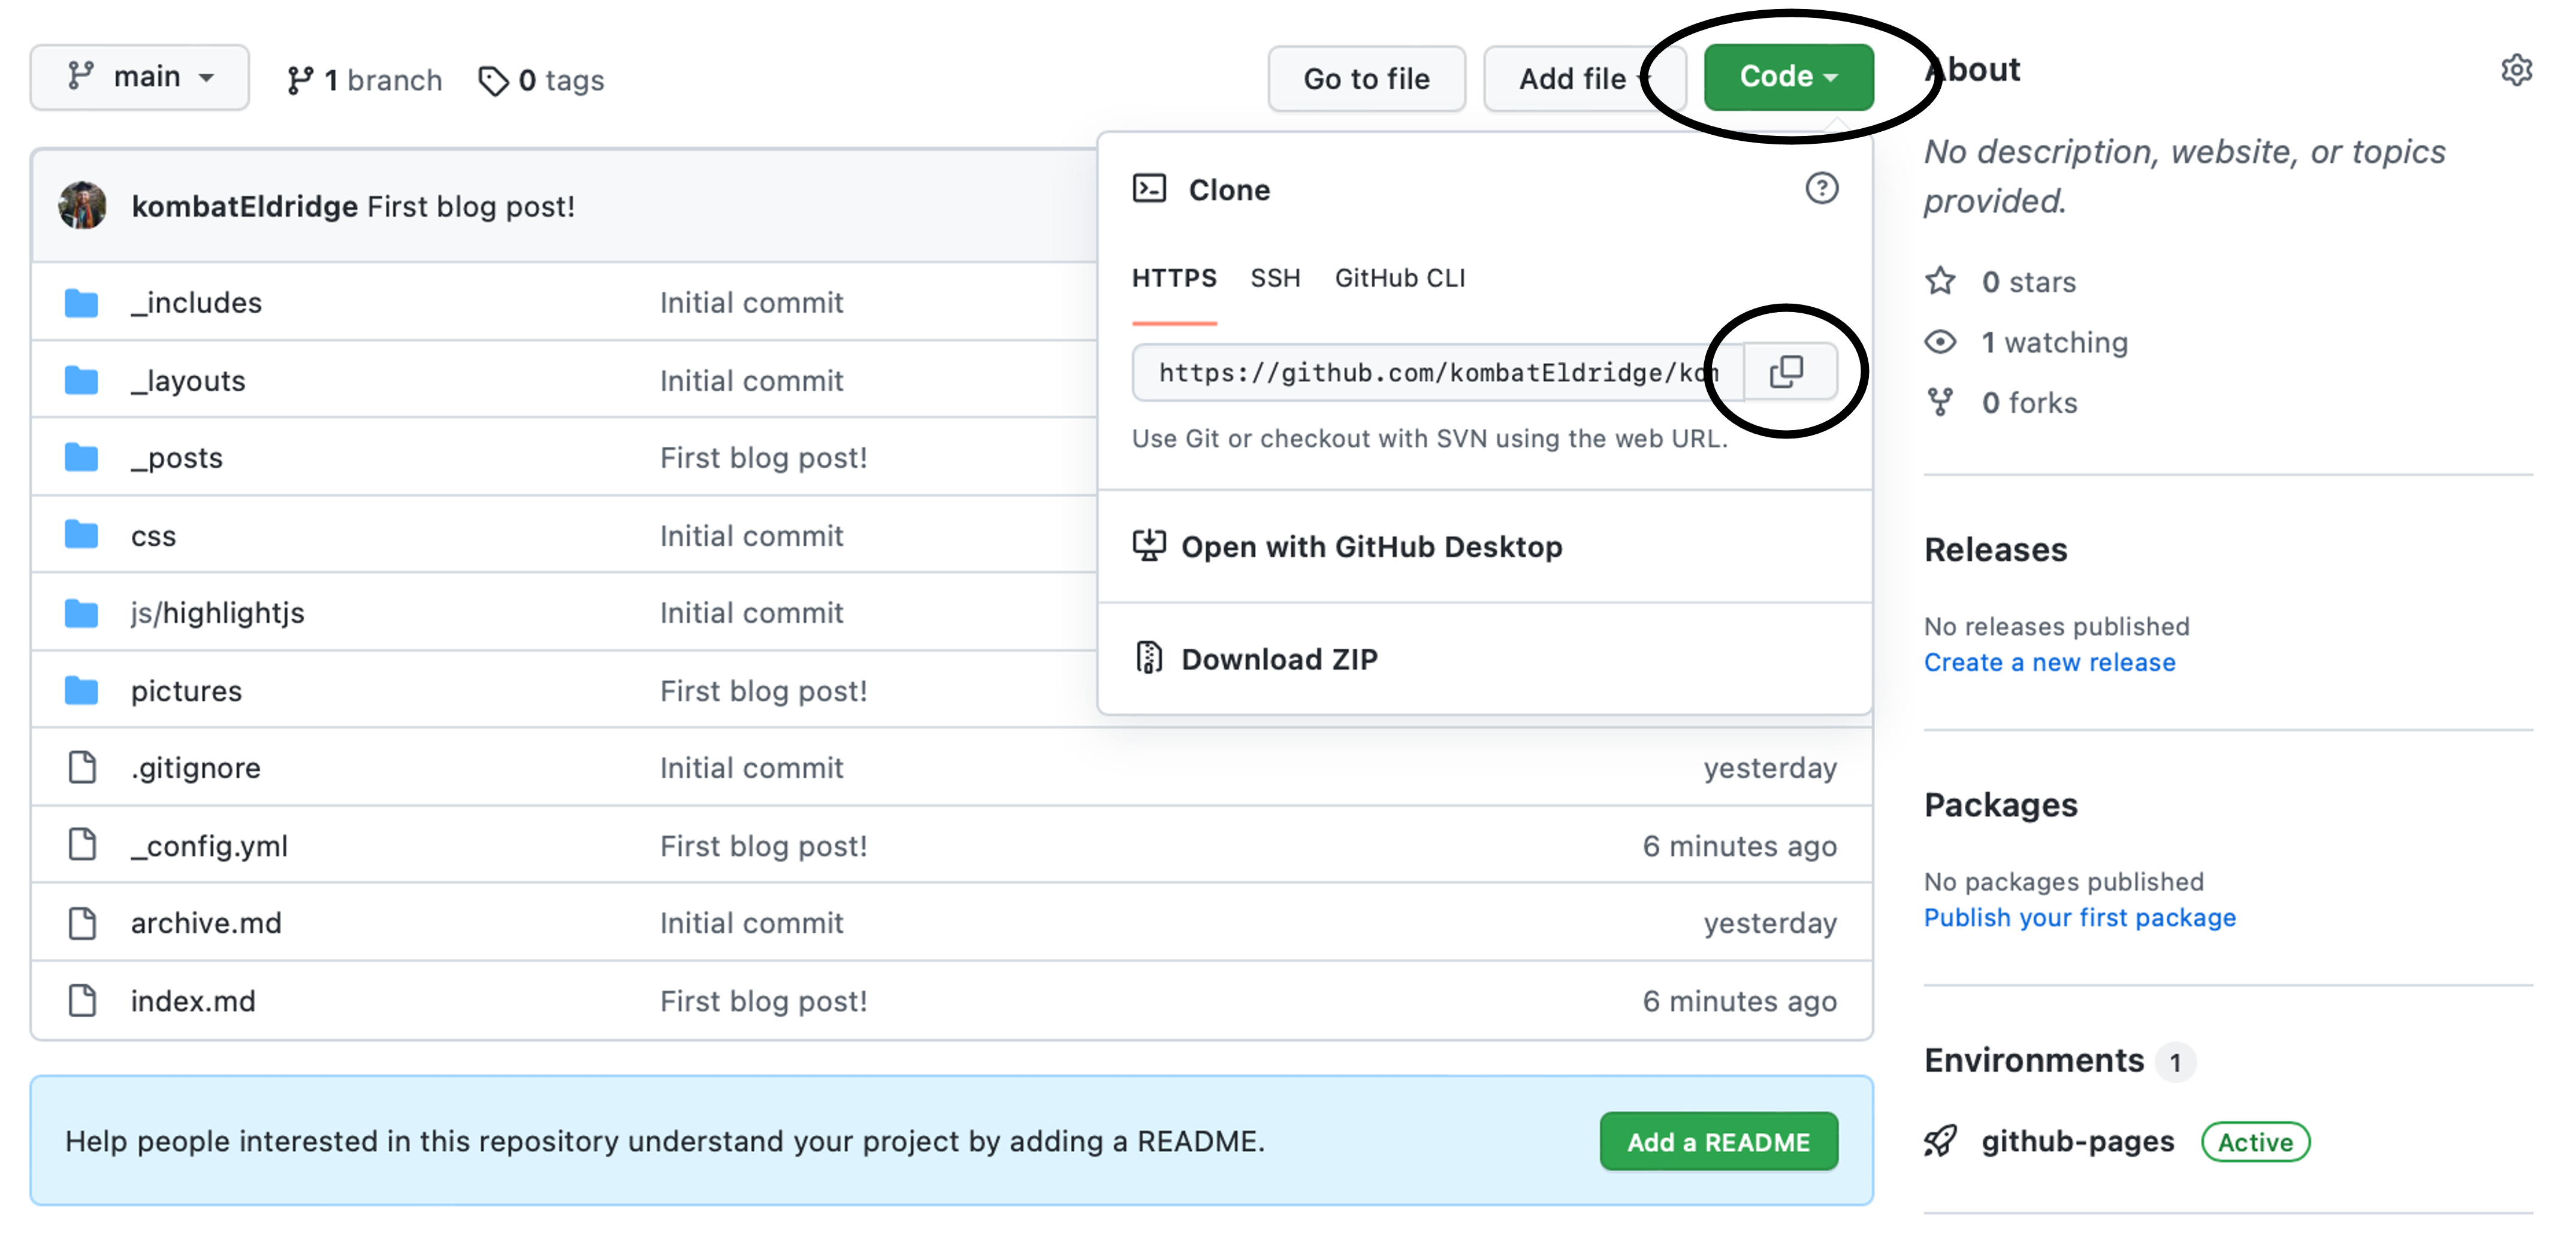
- In order to add your blog repository to your VS Code, go to the Code dropdown menu of your Repo page on GitHub.
-
Copy the HTTPS clone link
- Open VS Code
- Select Clone Repository in Source Control
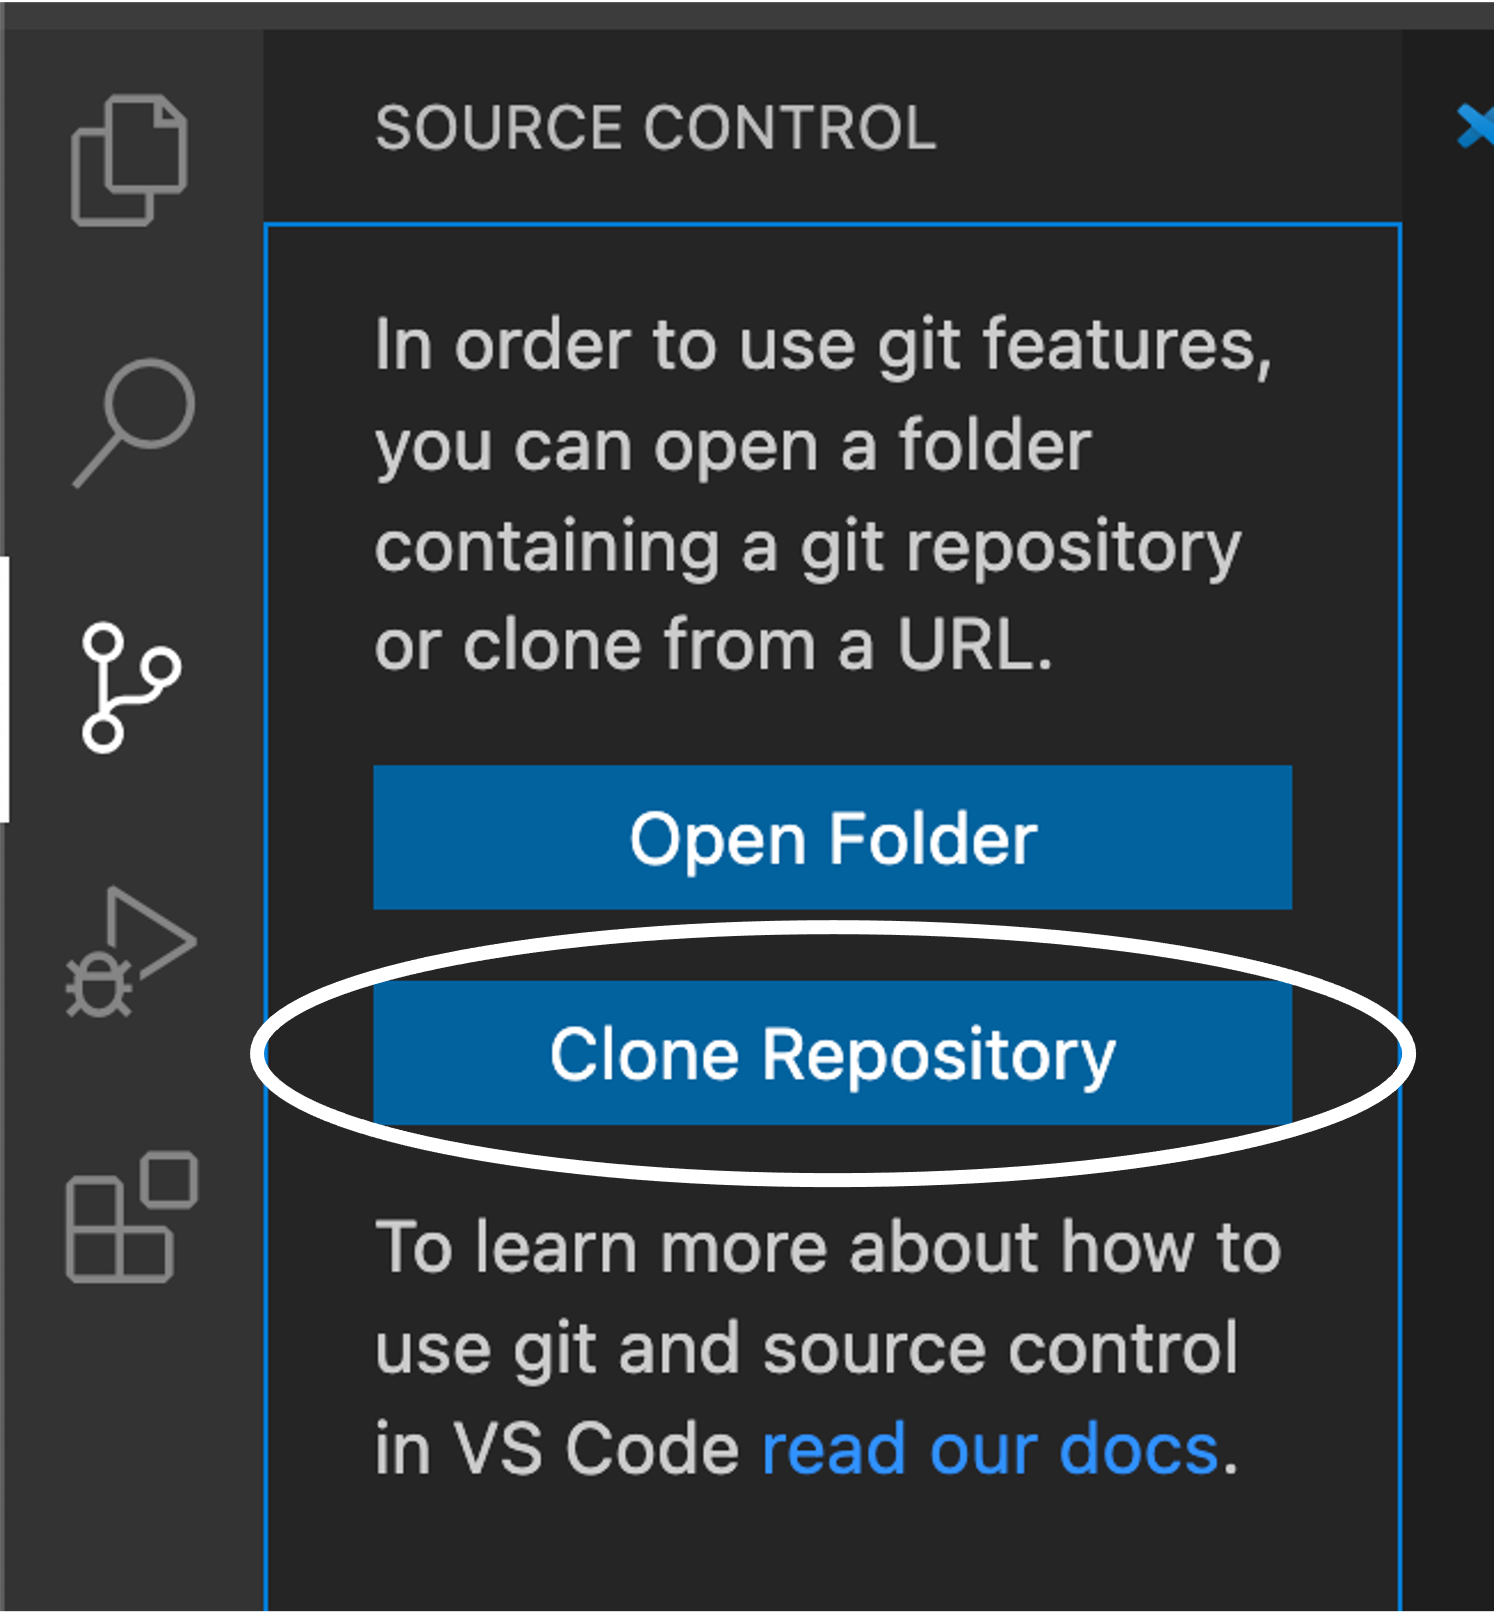
- Select a folder to host the Repo on your local hard drive.
- Now, anytime you open the Repo on VS Code, you can just save and commit your changes straight from VS Code and not GitHub.